The Grounds Guys explain how to winterize your sprinkler system to prevent damage.
|
The onset of chilly weather may encourage you to winterize your home. From adding garage door weather stripping to installing window insulation film, these efforts help you stay comfortable and lower your heating costs.
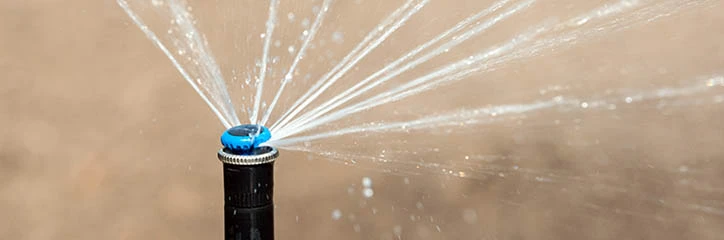
It’s also important to winterize your yard for an easier transition to warmer weather when spring arrives. This includes blowing out and shutting down your sprinkler system to prevent irrigation lines from freezing, cracking, and leaking. The best and safest way to winterize your sprinkler system is to leave the job to a qualified professional. If you decide to attempt this project yourself, follow these steps on how to winterize a sprinkler system.
Tools Needed to Drain a Sprinkler System for winter
- Water meter key (for valves located in an underground valve box)
- Pliers
- Flathead screwdriver
- Air compressor (if you decide to blow out the system yourself)
- Bowl (optional)
How Do You Winterize a Lawn Sprinkler System?
- Survey your sprinklers. Check for leaks, broken heads, and damaged nozzles. Repair any problems you find. Then, flag sprinkler heads so you don’t accidentally run them over or bash them with a snow shovel.
- Find the irrigation shutoff valve. This should be located somewhere between the water supply line and the backflow preventer. It may be positioned indoors (most likely in the basement, crawlspace, or garage) or outside in an underground valve box (which may require a water meter key to open). Give the valve a quarter-turn to shut off the water supply.
- Manually open the irrigation valves to remove any remaining water and prevent pressure buildup. This valve should be located in an underground valve box and may require pliers to open.
- Drain the backflow preventer. Find the test-cocks on the backflow preventer. They should feature ball valves, which you can turn using a flathead screwdriver. Twist the valves one-quarter turn to drain the water trapped inside. Then, leave the ball valves halfway open all winter —including those you can turn by hand—to prevent trapping water in the backflow preventer.
- Open the drain screws to release more water. One screw should be located near the irrigation shutoff valve, while the other is on the backflow preventer. Leave the indoor drain screw off all winter, with an optional bowl below the valve to catch any water that drips from it.
- Blow out the irrigation system. This involves hooking up an air compressor to remove all standing water from the pipes so they can’t freeze and burst. Keep in mind that while most consumer-owned air compressors can reach the recommended pounds per square inch (psi), they don’t generate the same cubic feet per minute (cfm) of air required to blow out a sprinkler system. Therefore, it’s best to leave this step to an irrigation professional.
- Insulate above-ground plumbing. Foam pipe insulation is an effective way to protect the backflow preventer and any other exposed plumbing.
- Shut down the irrigation control panel. This ensures the sprinkler system doesn’t come on automatically during the winter.
Call The Grounds Guys® to Winterize Your Sprinkler System
Failure to blow out and shut down the sprinkler system properly can end in disaster. Broken, leaky pipes can be inconvenient and costly to repair. For your peace of mind, consider calling The Grounds Guys to winterize your sprinkler system for you. This is just one of the many irrigation services we offer. To request your free job estimate, please contact us today