The Grounds Guys explain how to remove sod efficiently for landscaping projects.
|
Last Updated June 1, 2023
Digging up sod, which is basically mature grass, and moving it elsewhere produces quick results. This process allows you to repurpose healthy grass and prevents it from going to waste. However, successfully completing the sod removal and relocation process does require careful work. Many people don’t know how to remove sod without damaging it. So, let’s review the best ways to remove your sod and successfully transplant it so it continues to grow.
Table of Contents:
- What Is Sod and Why Remove It?
- Preparing for Sod Removal
- Tools Needed to Remove Sod
- Marking the Area for Removal
- Removing the Sod by Hand
- How Do You Remove Sod?
- Removing Sod with a Sod Cutter
- Removing Sod with a Skid Steer
- Alternative Methods of Sod Removal
- Preparing the Area for New Sod or Planting
- Caring for Sod Before Laying It
What Is Sod and Why Remove It?
Sod is mature grass, also known as turf, that is grown and harvested into rolls and later installed over an area, much like carpet. It consists of a top layer of soil and grass that is removed and relocated. Typically, sod is grown on a sod farm under ideal conditions, then harvested for residential or commercial landscape use. However, homeowners who wish to repurpose an area of their lawn can do so by removing a section or sections to use somewhere else on their property. There are several reasons why you might want to remove sod from an area of your property. Perhaps you're looking to create a pond, pathway, or garden on your property. Removing sod is a great way to expose healthy soil for a garden makeover and reuse the healthy grass in another area.
Preparing for Sod Removal
Removing sod by hand is a labor-intensive process requiring specialized tools and equipment. If you want to do it yourself, be cautious when using sharp sod removal tools, such as pitchforks, edgers, and shovels. If you’re planning to remove a large area of sod, prepare for backbreaking work.
Tools Needed to Remove Sod
Before you begin the sod removal process, make sure you have the following gardening tools on hand:
- Hose or sprinkler to water the sod when it’s relocated.
- Sharp spade shovel or edger to remove the sod.
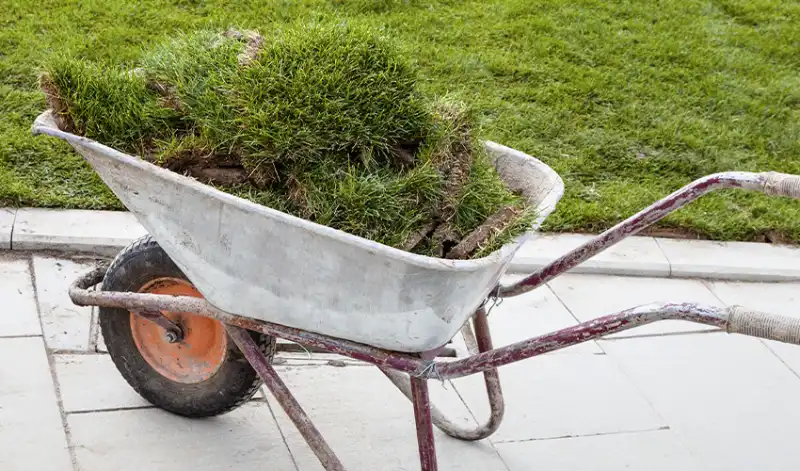
- Wheelbarrow to transport the sod.
Marking the Area for Removal
Before removing sod, you’ll want to create a layout (squares or rectangular patterns usually work best) of the area that will be removed. Accurately measure the distance between the corners. Then use twine and stakes or marker flags to set the perimeter of the area you will cut out. You can also use flour or spray paint to mark the area you want to remove.
Removing the Sod by Hand
If you plan on only removing a small area of sod, you can do so with the garden tools we mentioned. While small is a relative term, an area smaller than 5 square feet, which is 25 square feet, is manageable for most people. However, if you have a larger area to remove, having the sod professionally removed and installed will save you a lot of time and effort. This will also ensure the transplanted sod grows strong and healthy.
If you still want to try removing sod by hand, keep reading for tips on making the job easier and more efficient.
How Do You Remove Sod?
Here are the proper techniques to use when removing sod:
- Water the grass: A few days before you plan to dig up the sod, water the area thoroughly to soften the soil so it’s easier to work with. After letting it dry out for a few days, you should have moist—not soggy—soil, so it sticks together but isn’t too heavy to move.
- Cut into the sod: Using a sharp spade, shovel, or edger, cut around the perimeter of the grass you plan to remove. Then, cut the sod into one-foot by two-foot strips or one-foot-square pieces. This will make removing and handling the sod easier. You only need to break through the top layer of soil, so don’t worry about digging too deep, a few inches below the soil is sufficient.
- Pry up the sod: Dig under one end of each piece of sod, and shove a spade or pitchfork under it to cut through the grass roots. Lift out the pre-cut piece and shake any loose soil back onto the ground. This will help lighten the load when it comes to transporting.
- Roll up the sod: If your pieces of sod are long enough, roll them up like carpeting. If you opted for square pieces, stack them onto a wheelbarrow or close to where you plan to transplant the sod.
Removing Sod with a Sod Cutter
Using a sod cutter is a wise move for more extensive lawns. There are two types, motorized and manual, and each type cuts grass at the roots and creates strips that can be conveniently rolled up and transported. They are generally easy to use, but since they have very sharp blades, it is essential to use them safely.
Removing Sod with a Skid Steer
Skid steers are ideal when dealing with an area larger than ½ an acre. While they are very efficient for large-sized properties, special care must be used when operating one. An inexperienced operator can damage irrigation heads and remove too much soil in the process. For these reasons, using a skid steer to remove sod is best left for an experienced landscaper.
Alternative Methods of Sod Removal
Now that you know how to remove sod from your yard manually, here are some alternative methods for removing sod. Other methods to remove sod include, using a rototiller or sod roller, but both of these methods are best performed by an experienced pro.
Once you have decided on the method that will be used to remove the sod, the next step is to prepare the area where the sod will be transplanted. Follow these steps to ensure the transplanted sod takes root and grows into a healthy lawn:
Preparing the Area for New Sod or Planting
- Remove stumps, rocks, stones, bricks, and other debris from the area.
- Do a rough grade of the site and smooth out obvious mounds of dirt.
- Prepare the soil by tilling and adding high-quality topsoil.
- Do a final grading (should be about ¾ inch below sidewalks and driveways).
- Apply a starter fertilizer.
- Let the surface settle.
Caring for Sod Before Laying It
If you cannot transplant the sod immediately, you typically have up to five days to lay it before the grass dies. This timing also depends on the time of year and weather conditions once the sod is removed. In mid-summer, actively growing sod can begin showing signs of stress in as little as 12 hours. For this reason, you may want to prepare the transplant location for sod before you begin digging it out of the ground.
If the sod is removed and must sit out for more than a day, remember that moisture is the key to its survival. Set the squares or strips of sod in a shady spot where the sun can’t dry them out. If several hours go by, unroll the sod so you can water it. This also allows heat to escape, which will help keep the grass from dying until you can complete the transplant.
Get Professional Sod Removal and Installation Assistance
Now that you know how to remove sod, you may be eager to get started. Keep in mind that sod is very heavy, and removing sod manually is a time and labor-intensive job. And unless it’s a very small area, you will probably need help from another person to complete the job to ensure that sod stays alive and healthy during the transfer. If you plan to sod a large area, over 10 square feet, it’s best to hire a professional to do the job. A pro will have the right tools, manpower and experience to remove and transplant the sod to ensure it stays healthy and grows into a beautiful lawn.
If you need help, The Grounds Guys have the right tools and expertise to get the job done. And as part of the Neighborly family of home service brands, all their work is backed by the Neighborly Done Right Promise™, which guarantees your satisfaction.
Contact us today to learn more about all of the lawn care and landscape services we offer.